Saturday, June 13, 2009

Carrot cake or Chai Tow Kway


You know you've been living overseas for too long when you start learning to concoct hawker fare you'd never dream of making when you're in your home country. This was my attempt at making carrot cake, as what us Singaporeans would call it, though the dish has nothing to do with carrots nor cake. It's probably more correct to call it by its hokkien name: Chai Tow Kway.

Equipment:
  1. A 2-quart saucepan, preferably non-stick
  2. A spatula for stirring
  3. A deep casserole dish

Ingredients:
  1. rice flour - 1 cup
  2. wheat flour - 1 cup
  3. dried shrimp - a handful
  4. water - 3 cups
  5. five spice powder - a dash
  6. black pepper - a dash
  7. salt - a pinch
  8. spring onion - a sprig, for garnish
  9. dark soy sauce - a tablespoon
  10. minced garlic - a tablespoon
  11. EVOO - a tablespoon
  12. eggs - 2 to 4 (I like it eggy, so I use 4)

Method:
First, throw in ingredients 1-7 into your saucepan and stir till dissolve. Then crank up the heat and it'll start coagulating. When you get a nice semi-solid mass, pour out into your casserole dish and steam for 30 min. (Optional: if you're lazy like me, cover with a wet kitchen towel and microwave on high for about 8 minutes or till the cake sets. This is much faster and I don't taste any difference in the result.) Once the cake sets, stir fry it with garlic and some oil (I imagine if you use pork lard or some bacon drippings it'll be better, but warning: extremely unhealthy!) and beat an egg or two into it when you're almost done. Include an optional tablespoon of dark soy sauce if you like the black type. The one shown here is with dark soy sauce.

The result: Carrot cake that tastes almost like home!

Monday, October 06, 2008

Tuna Crepes and Shrimp Salad


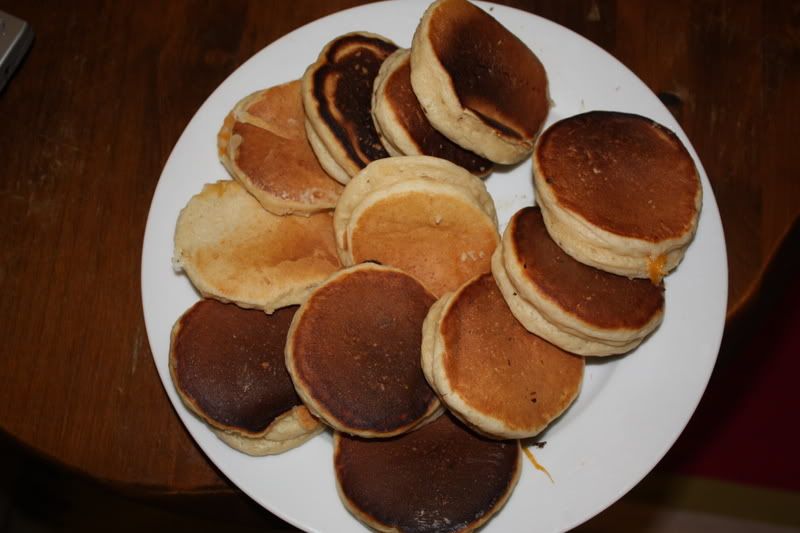
This dish might not impress your Chinese mother-in-law, but it's sure to impress your friends. Originally, I was just trying to make pancakes, but I had milk I wanted to use up and not much self-rising flour left. Looking at the batter thicken, I thought, "Oh, might as well pour all the milk in, perhaps they'll make thinner pancakes...or, ooh! Crepes! Maybe that's how they're made -- more milk!"

So I excitedly whipped up a thinner batter with added milk. Twice the usual amount I'd use for making regular pancakes. And hurrah! Crepe-like cuisine appeared, very edible and tasty! Of course, I continued to fantasize how I could add this and that to make it look like the crepes they sell in shops. And mighty pleased I was with the outcome. Such an invigorating evening meal!

Equipment:
  1. 3 Mixing bowls for making crepe batter, tuna filling and shrimp salad
  2. Mixing spoons/forks
  3. Wooden spoon or slated spoon for flipping pancakes
  4. Non-stick frying pan
  5. A ladle

Ingredients for crepe:
  1. Self-raising flour --- 1 cup
  2. Baking powder --- 1 teaspoon
  3. Sugar --- 2 heaped table spoons
  4. Salt --- just a pinch
  5. Egg --- 1 large
  6. Milk (I prefer full-cream) ---- about 2 cups (or simply twice of your flour)
Ingredients for tuna filling:
  1. Yellow onion --- half of an onion (about the size of a tennis ball), minced
  2. Flat-leaf parsley --- 3 heaped table spoons, chopped up
  3. Mayonnaise --- 3 heaped table spoons
  4. Salt --- just a pinch
  5. tuna cans --- 1 large or 2 small (6oz each)
Ingredients for shrimp salad:
  1. Romaine hearts --- 1 head
  2. Cooked shrimp --- as much as you want (in the pic, I used three handfuls)
  3. Mayonnaise --- 1 heaped table spoon
  4. Garlic --- 1 dessertspoon, chopped
  5. Flat-leaf parsley --- 1 dessertspoon, chopped

Method:
First, mix the ingredients for crepes in the mixing bowl with a spoon. Meanwhile, heat up your flat pan. If you get a mixture that's too thick, just add more milk. The desired batter should hardly be considered gooey. Once that's done, you can spoon it onto your heated pan (it should be on high heat!). As the batter touches the pan, spread it thin by drawing concentric circles with your ladle so the mixture is moved to form circular shapes. 
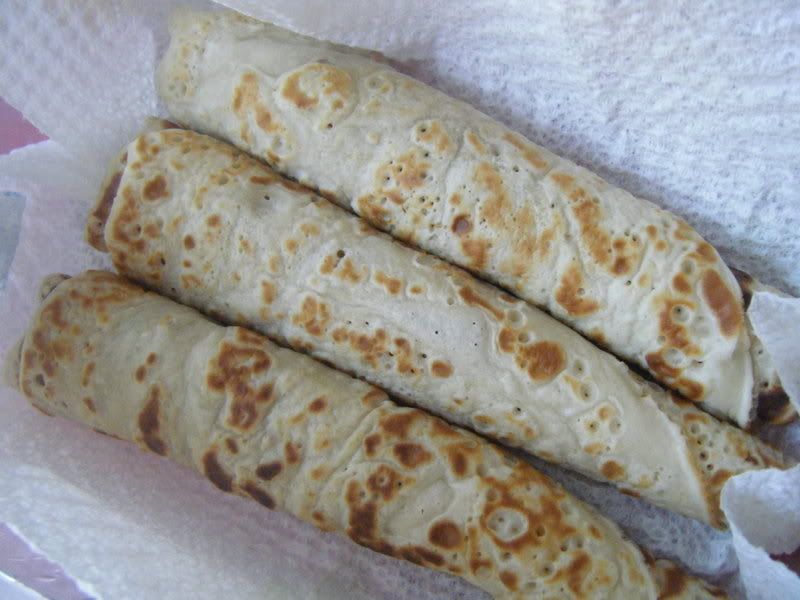
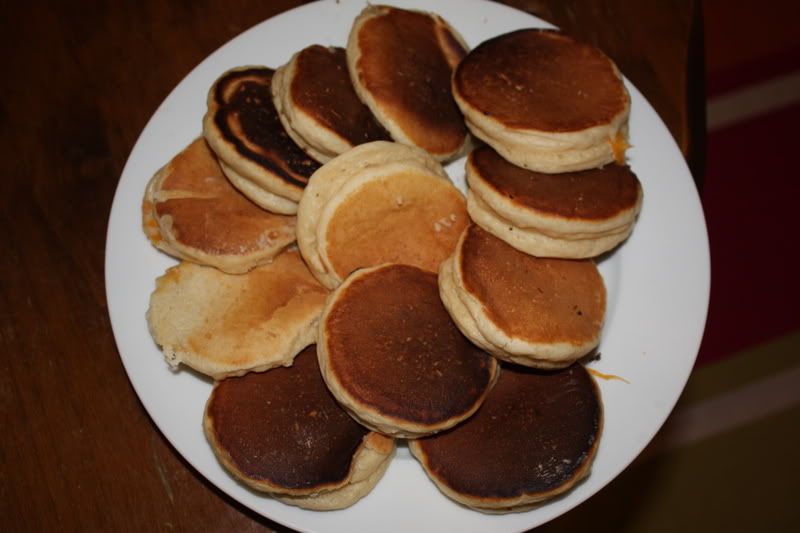
Depending on how large you want your crepes to be, just add according to your desire. I used 2 scoops of the ladle for each crepe in this pic.

You have to flip the crepe pretty quick, otherwise it burns. So, if you're the sort that likes to multi-task like me, I started chopping my onion and preparing my tuna filling and shrimp salad in between flipping the crepes and spooning new batter onto the pan. But it takes quite a bit of memory to remember where you are doing what you are doing. So if you'd prefer to just focus on making the crepes, definitely stay with doing that. Don't want to have no crepes for your tuna filling!

The tuna filling is real easy anyway. Simply prepare all the ingredients, mix them altogether and you'll have it. There's no order to how you mix them. Just open those cans, chop up the onion, the parsley, throw them altogether and that's all there is to it.

Same for the shrimp salad. Can't get any easier, and they look exquisite! Mayonnaise, garlic and pre-cooked, frozen shrimps. All I had to do was rinse the frozen shrimp under cold water and that's about it really. Just like for the tuna filling, throw everything in the bowl, mix them all up and set it aside.

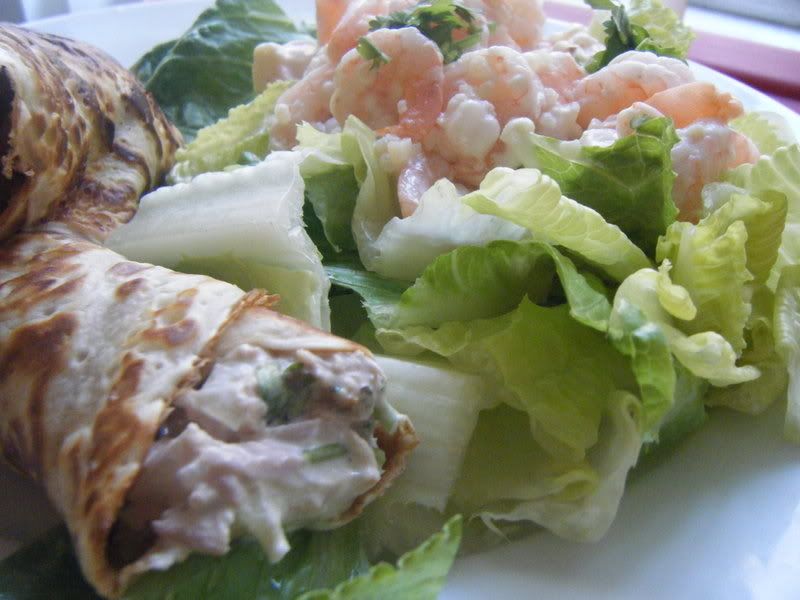
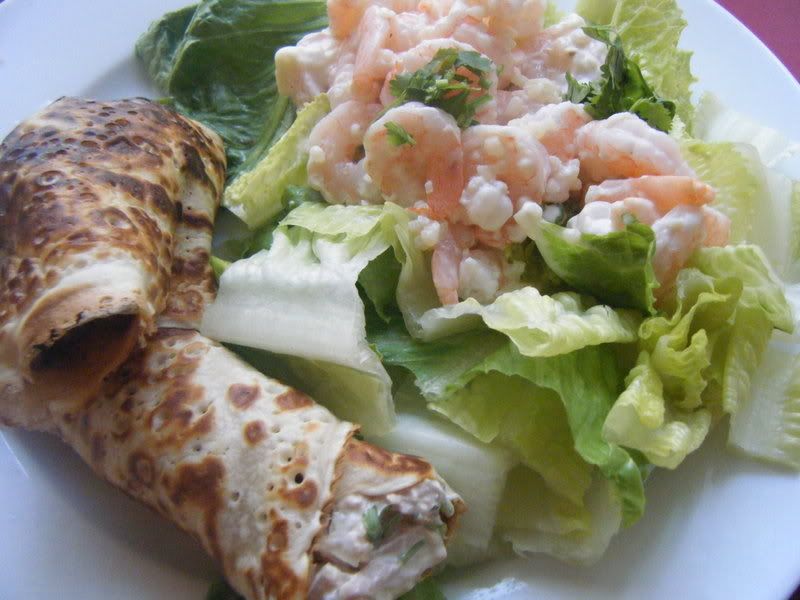
Meanwhile, you can prepare your plate. I chopped one head of romaine hearts for two plates. Spooned the shrimp salad on top of the romaine leaves. Then when the crepes are dones, I spooned the tuna filling (about 2 spoons or as much as you want really) onto a crepe, rolled them up and put them prettily alongside the shrimp salad.

This is so pretty and so easy. If you have girlfriends over, this will be the meal that'll make everyone happy since it's low-calory and fresh!

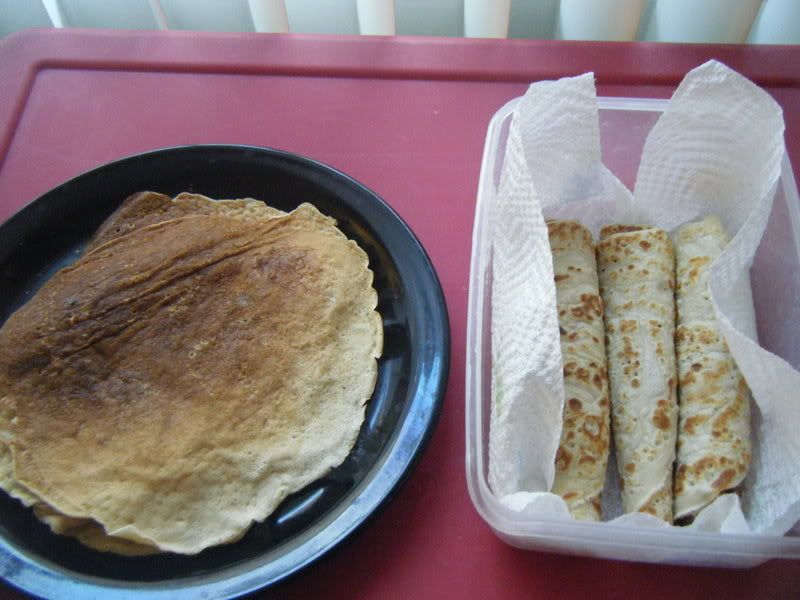
After that, you can also store leftover crepes and tuna fillings in the fridge and they'll make a great snack anytime of the day.

Dry noodles with Country-Style Pork Ribs


So I'm still using up those country-style pork ribs. What a great dish that lasts so well. Here's another version of noodles with the rib meats, but no soup.

Friday, October 03, 2008

Noodles with Home-Made Roast Pork


So a week later, I'm still finishing up the country-style, pork ribs I baked previously. Here's what I did. I took a chunk of the already baked meat from the fridge, sliced it up and heated it up in the microwave. It took less than 30 secs to do it. Meanwhile, I had the water boiling in a saucepan and ready to cook up a packet of instant noodles.

No sooner than 5 mins more, I had a piping bowl of noodles with barbequed char siew meat on top, garnished with flat-leaf parsley and a leaf of romaine hearts for some healthy fibre!

Monday, September 29, 2008

Finger-licking, Country-style, Barbeque Pork Ribs!


After I made this dish the other day, I've decided it'll be one of my favorites. So simple and sure to impress your mother-in-law!

Equipment:
  1. Big Bowl or Ziploc Bag for marinating meats

Ingredients:
  1. Marinade -- a pinch of salt, five spice powder (as much as you want!), black pepper (as much as you want, although if you don't like it too spicy, go slow with it), a bottle of barbeque sauce (I used Tony Roma's bottled barbeque sauce), and if you like, some regular or hot mustard
  2. Country-style pork ribs --- 4 lbs (thick cut ones are better as they retain moisture when you bake them)
  3. Flat-leaf parsley -- as much as you like, it's mainly for garnishing :)

Method:
It can't get any easier. Preparation time was like 5 minutes! First, coat the pork with the marinade and leave the meats in the fridge. The longer you marinate it, the better. I left mine for 24 hours. Then when you're ready for those good ribs, just pop them in the oven at 400 degrees Fahrenheit for one hour (Don't overcook cos the ribs will go dry!).

Note:
1) I didn't use a ziploc bag when I last did them, but it's really easy with one of those. You can just mix the marinade in the bag, then put the meats in, zip the bag up, and tilt the bag a few times to coat the meat.
2) With the access marinade, boil it in a saucepan and pour over ribs when they're done.


Final result: Absolutely delicious ribs, still juicy on the inside and with that tasty char-grill on the outside. Mmmm...

Wednesday, September 10, 2008

Juicy Beef Pot Roast


I was first introduced to this dish by my dear American friend, MD. She'd used a packet of onion powder mix and a large can of Campbell mushroom soup. Yesterday, I just tried to repeat this when I didn't have the two ingredients and I found out it worked just as well! The important ingredient is the creamy soup base and any kind will do. And if you can't get hold of a packet of onion powder mix, simply make your own! I also didn't add beef broth or water as most recipes will tell you. I think it works out fine without too.

Equipment:
  1. Slow Cooker (at least 4 quarts big)
  2. Wooden spoon

Ingredients:
  1. Onion powder mix -- in this recipe, I mixed onion powder, garlic powder, dried thyme leaves, five spice powder and black pepper. Actually, I believe you can throw in whatever else you want into the powder mix too such as basil, rosemary, sage, etc. I don't think you can ever overdo it with herbs. So use whatever you have and whatever you want freely :) The more you put in, the more flavorful!
  2. Beef chuck roast or pot roast --- 4 lbs
  3. Creamy soup cans --- I used a large can of clam chowder cos that's what I had. Most recipes call for mushroom soup, but the clam chowder turned out fine!
  4. Flat-leaf parsley -- as much as you like, it's mainly for garnishing :)

Method:
This is so easy. First, marinate the beef with the onion powder mix in the slow cooker. Secondly, add the can of soup over it. Stir it a little just to coat the meat with the creamy soup. Then switch on the slow cooker to low heat and cook for 8 hrs. You don't have to touch it anymore after that, so how easy can it get?

Notice I never used salt. The soup is usually savory enough, so I don't add anymore. But you can add if you prefer it more salty, but I think it's healthier this way without.


Final result: Beautifully browned, tender, juicy, beef pot roast just bubbling away in the pot whilst you go to work, go home, do housework, or whatever you want to do for the day. It's as easy as A,B,C! And it's all ready miraculously when you are ready to dig in for dinner at the end of the day!

Thursday, August 21, 2008

Cheese Pancakes


Sometime last year, I started exploring ways of cooking those yummy pancakes with cheese, tuna, green bean or red bean fillings in food stalls usually at the basement of some shopping plaza in Singapore. And I'm so happy I successfully made the recipe up!

Here's the full
works!
Equipment:
  1. Big mixing bowl
  2. Mixing spoon
  3. Wooden spoon or slated spoon for flipping pancakes
  4. Non-stick frying pan
  5. Soup spoon

Ingredients:
  1. Self-raising flour --- 1 1/2 to 2 cups
  2. Baking powder --- 1 teaspoon
  3. Sugar --- 2 heaped table spoons
  4. Salt --- just a pinch
  5. Egg --- 1 large
  6. Milk (I prefer full-cream) ---- about 1 cup
  7. Cheese --- in the pic, I've used 2 slices of sharp cheddar and 2 slices of swiss (you can choose whatever type you like, I've tried mozarella too, works great with all types of cheese! You can also use peanut butter, which is equally fantastic!)

Method:
First, mix the ingredients 1-6 in the mixing bowl with a spoon. When you get a viscous mixture with the pancake batter just dripping off the spoon like a gooey liquid, which shouldn't take more than 2 minutes, you can start heating the non-stick pan.

Next, using the soup spoon, drop 4 to 6 spoonfuls of the batter onto the heated ready pan. It needs to be an even number of scoops as you'll be flipping one pancake over the other after you add the cheese (or any other fillings). Supposing you drop 4 pancake batter at a go, add cheese to the last 2 whilst letting the heat cook all the pancakes up till bubbles burst on the surface, which might be no more than half a minute depending on your heating element and your pan. As pancakes cook really fast, be careful to adjust it according to how fast your pancakes are browning.

Finally, pop the first 2 pancakes which will cook faster (without fillings) unto the last 2 pancakes (with fillings) and press them down to seal the cheese within the batter. You can turn down the heat if you think the pancakes are burning too fast.

Final result: Beautifully browned, cheesy pancakes! They're wonderful snacks and also make for an inviting breakfast which you can make the night before, store in a tupperware then heat them in the microwave the next morning to make the cheese melt (Not too long though, maybe 10-15 seconds in the microwave.)


Wednesday, March 05, 2008

Next, Fried Dumplings!!!


After I'd wrapped and boiled about 400 dumplings since my last blog entry, I decided yesterday to try baking it. It took about 40 minutes at 425 degrees Fahrenheit and the skins didn't crisp very well, so today, I tried them fried with extra virgin olive oil. And what a wonderful outcome I experienced!

I had changed the recipe slightly as I ran out of meat and prawns in my refridgerator and replaced them with siken tofu, cream cheese and finely shredded, sharp cheddar cheese. It was wonderful! The changes in the recipe went extremely well with the frying method.

I didn't use too much oil, just enough to coat the frying pan and with maybe 1mm of depth. The dumplings fried a golden brown beautifully within minutes of flipping them about. Not wanting the excess oil to go to waste, I drizzled them over my organic, mixed herb salad.

In the picture, I have also baked some chicken to go with the meal. The drumsticks were simply marinated with salt, pepper, and barbeque sauce for about 5 minutes. Nothing too complicated. They were then roasted in the oven at 425 degrees Fahrenheit for 45 minutes.

As for the salad, I simply tossed together a dessert spoon of minced garlic, 1 tablespoon of raw onions chopped and minced, and used an Asian ginger dressing over 3 handfuls of organic herb salad in a mixing bowl. Easy fixing, really!

Dumpling Noodles!!!


It all started when I had a sudden craving for dumplings one fine day about two weeks ago, which happened to be sometime over the Chinese New Year 2008. The thought of how a big, juicy dumpling would burst in my mouth and tease my palate made me almost obsessed to re-create these here in Savannah, where good and authentic Chinese cuisine is almost impossible to find. So I think between 7 Feb 08 (which was the eve of Chinese New Year in 2008) and today, 5 Mar 08, I must have wrapped more than 400 dumplings!

With every session of wrapping these delectable parcels, the art was perfected and the taste refined. Here's the final approved recipe.

Equipment:

  1. Chopping board
  2. Chopper or chef knife
  3. Big mixing bowl
  4. Mixing spoon
  5. Saucepan
  6. Ladle

Ingredients:
  1. Prawns -- 20 uncooked, peeled and deveined (or half the amount of the meat) [omit this ingredient if you wanna go vegetarian]
  2. Ground pork/chicken/turkey/beef (it works with every type of meat or try tofu if you wanna go vegetarian) -- 2lbs
  3. Carrots --- about 10 baby carrots (the type that's washed and ready to eat)
  4. Chinese mushrooms --- about 5 big ones
  5. English button mushrooms --- about 5, chopped and minced
  6. Minced garlic ---- about 1 tablespoon
  7. Onions --- 1 whole yellow onion chopped and minced
  8. Cilantro --- about 8 tablespoons of it chopped and minced (or as much as you like!!!)
  9. Wonton skins --- enough to wrap 100
  10. Sesame Oil --- 1 tablespoon
  11. Light soy sauce --- 3 tablespoons
  12. Five spices --- 4 tablespoons
  13. Salt --- 3 teaspoons
  14. Black pepper --- 2 teaspoons
  15. Egg --- 1 large egg

Method:
First, soak the Chinese mushrooms until soft. Meanwhile, you can get to work mincing the button mushrooms, cilantro, carrots, shelling the prawns and dicing them up. When the Chinese mushrooms are manageable, cut them up to small pieces and mix all the ingredients together in your mixing bowl, including your seasonings.

The cilantro is a key ingredient without which will make your dumplings taste different.

Next, place a wonton skin on your palm and put a spoon of the mixture on it. Then envelope the skin over the mixture, forming a little parcel without leaks if possible. You can make them to form any shape you want, as long as the skins are able to close over with some water or egg-white.

Finally, pop the parcels into a pot of boiling water and cook for no more than 5 minutes. They cook really fast and if you don't fish them out in time, you might start seeing the skins slip off the meats!

Final result: Beautiful juicy dumplings. In the picture, I have boiled some rahmen and conjured a sauce for the noodles with 2 tablespoons of soy sauce, 1 dessert spoon of ketchup and 2 teaspoons of sesame oil. For roughage, I included some boiled lettuce. And not to waste the water that was used to cook the dumplings and lettuce, I added some silk tofu, button mushrooms and half an onion to it and made soup out of it!

Note: You don't have to wrap all the fillings at one time. You can refridgerate the leftovers and have them ready to be wrapped the next time you want dumpling noodles. By then, with the food already processed, your cooking time will be less than 30 minutes!